Setting Up a Kickass, Self-Hosted, GitHub Alternative with Continuous Integration
This is part I, wherein we set up the web-based GitHub alternative, Gitea. Stay tuned for part II, where we will setup the Docker-based continuous-integration solution, Drone, with plugins for Gitea.
As I have chronicled before, over the last few years I have been on a journey to move to using 100% self-hosted services. The basics were fairly easy (cloud, calendar, contacts, website, &c.), but I ran into a bit of a pain point when it came to moving away from GitHub.
I write a pretty large amount of code in a week, and I rely on unit/integration tests to help make sure everything is running smoothly. So, for this solution a good continuous-integration platform was absolutely necessary. As a bonus, I wanted it to integrate nicely with whatever web-based Git hosting server I was using.
Eventually I settled on a stack of Gitea for the web-based repository management, and Drone as my continuous-integration platform.
Why not GitLab?
At past jobs, I've used GitLab. GitLab is a self-hostable web-based git repo manager with built-in continuous-integration support. For the most part, it worked pretty well, but I always had the nagging feeling that I wasn't making full use of its features.
For my purposes, GitLab is just too heavy and does too much. For enterprise teams, this expansive feature-set is probably useful, but for my simple use case, I found it to be slower and more resource-intensive than necessary.
Enter: Gitea...
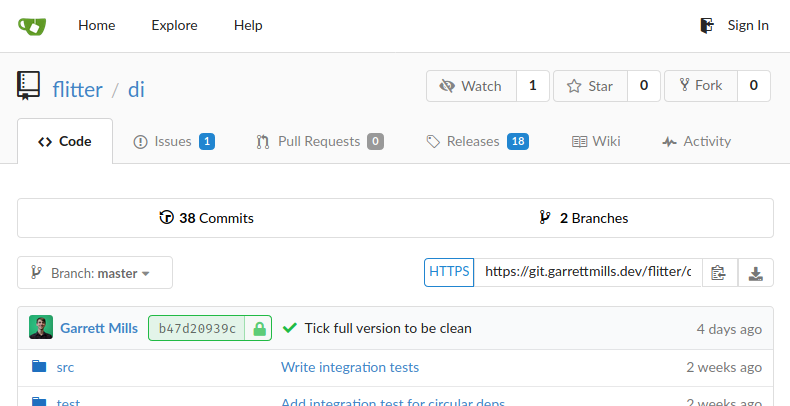
An example of the Gitea interface (flitter-di).
Gitea is a self-hosted Git platform that is very similar to GitHub. It provides web-based repositories that can be shared with different levels of collaboration, wiki, issues, pull-requests, releases, multiple auth sources, and support for many different CI platforms.
Gitea spars with GitHub feature-for-feature, for the most part. I didn't make extensive use of GitHub's more advanced features (and don't do so with Gitea either), but in my day-to-day use I've yet to run into a situation where I found Gitea lacking.
It also ships in a single binary executable file that is less than 80 MB, practically sips system resources while running, and is pretty configurable if you care to dig in.
...and Drone.
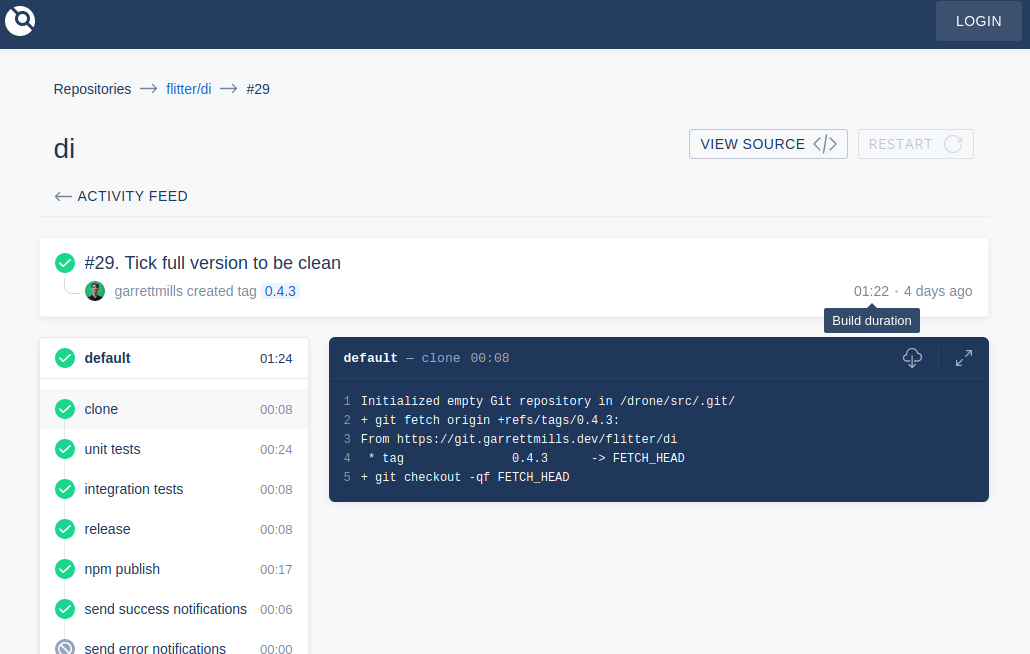
An example of the Drone CI interface.
For continuous-integration, I decided to branch out and go with Drone. Drone is a stupid-simple continuous-integration platform based on Docker containers. It has a few particular benefits that I care about:
- Excellent integration with Gitea for commits, pull-requests, and authentication
- Everything's containerized, so concurrent builds are fine
- Pipelines are defined in YAML files in the repositories themselves
- Lots of pre-built containers, but you can also use any Docker container as a build-step
Drone uses a core server, which runs in Docker, and any number of runners, which also run in Docker and spawn containers to run the individual steps in the pipeline built repositories.
Step 0 - Prerequisites
For this project, you need a server or VPS instance that is capable of running docker containers, and is accessible from either the Internet, or whatever network you are setting this up on.
I am using a physical server for this, but you can just as easily spin up a Docker-capable VPS from a company like DigitalOcean.
I'm using Ubuntu 18.04 in this tutorial, but you can pretty easily generalize this to whatever your OS of preference is.
Software Requirements
- Git (some recent version, please)
- Docker (setting this up is outside the scope of this post. Here's a guide.)
Step 1 - Reverse Proxy
While both Gitea and Drone have support for serving over TLS, we're going to use a more scalable approach and access them through a reverse proxy. A reverse proxy is simply a web-server (in our case, Apache2, but you can also use NGINX) that accepts TLS connections on a public port and, based on the incoming domain, proxies those requests to the appropriate backend service.
As mentioned, we're going to set up Apache2 for this case, but that's not a hard requirement:
~# apt install -y apache2			# install the server
~# a2enmod proxy					# enable the proxy module
~# a2enmod proxy_http				# enable the HTTP proxy
~# a2enmod proxy_wstunnel			# enable the WebSocket proxy
~# systemctl enable apache2			# make apache2 start on boot
~# systemctl restart apache2		# restart apache2
These commands install the Apache2 server and enables the proxy modules we need for this setup.
Step 2 - Install Gitea
You can find the links to download the latest version of Gitea here, but at the time of writing, the latest stable version is 1.11.1, so I'll be using that for this guide.
Note: this is meant as a quick walk-through only, where I highlight the specifics of my configuration. For setup instructions and more in-depth info, see the excellent Gitea docs.
Download the binary:
wget https://dl.gitea.io/gitea/1.11.1/gitea-1.11.1-linux-amd64
mv gitea-1.11.1-linux-amd64 gitea
This has created a gitea binary in the current directory. This is the single binary necessary to run the Gitea server.
Create the git user
We don't want to run Gitea directly as root, or some actual user, so we're going to create a user, git, that Gitea will use to run the server and manage files:
~# adduser --system --shell /bin/bash --group git --disabled-password --home /home/git git
You definitely need a separate user for Gitea, particularly because we're going to be enabling SSH repository access. So, segmenting security here is an absolute must. Don't be tempted to run this as root. Ever.
Initial Setup
Generally, follow the instructions in the Gitea Docs to create the default directories and install the binary. Then, you need to create a SystemD service file to start Gitea as a daemon in the background. Here's an example of the file I use, placed in /etc/systemd/system/gitea.service:
[Unit]
Description=Gitea
After=syslog.target
After=network.target

[Service]
RestartSec=2s
Type=simple
User=git
Group=git
WorkingDirectory=/var/lib/gitea/
ExecStart=/usr/local/bin/gitea web -c /etc/gitea/app.ini
Restart=always
Environment=USER=git HOME=/home/git GITEA_WORK_DIR=/var/lib/gitea

[Install]
WantedBy=multi-user.target
This service will restart 2 seconds after the process fails, should that happen. After creating this service file, we need to do three things: (1) create the git user's home directory, (2) reload the SystemD daemon, and (3) start the Gitea service:
~# mkdir /home/git
~# chown -R git:git /home/git
~# systemctl daemon-reload
~# systemctl start gitea
Now, if everything has gone well, you should be able to navigate to port 3000 of the server and see the Gitea interface. (Don't worry, we'll be locking that down later on.) Clicking "Login" for the first time, you should be presented with the Initial Configuration form:
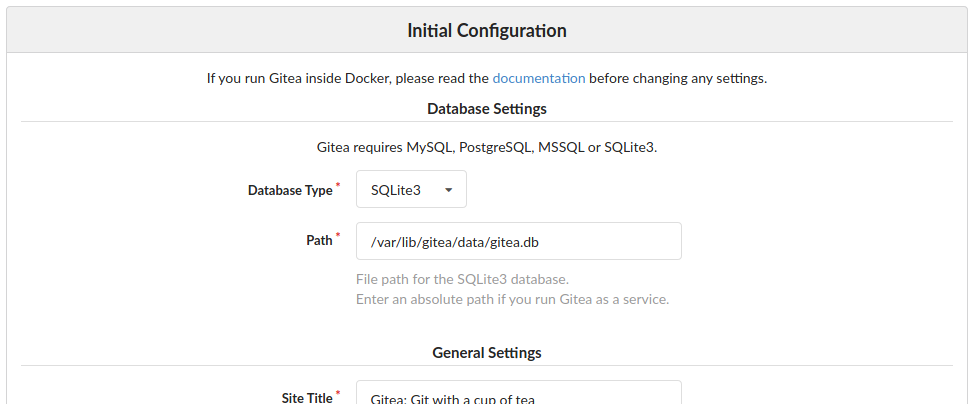
The Gitea Initial Configuration wizard sets up the database backend and creates a basic
/etc/gitea/app.ini config file.
If you have an existing MySQL or Postgres server, you can configure those credentials here. If you don't, you can use the built-in SQLite3 driver to use a filesystem-backed database.
Note: it's really recommended to use a proper SQL backend as opposed to SQLite3. Particularly for larger deployments, SQLite3 can become resource intensive, less performant, and harder to manage and maintain compared to something like PostgreSQL.
Most of the settings here you can leave at the defaults, or customize to suit your fancy, but of particular note are the following:
- SSH Server Domain: change this to be the external domain that will be used to access the server. (e.g. rather than "localhost", perhaps it should be "git.yourdomain.com".)
- We're going to set up a non-standard SSH config wherein the main SSH server used to access your server for day-to-day admin stuff runs on a different port than 22. Then, we'll enable Gitea's built-in SSH server to allow SSH access ONLY to Git repositories on port 22.
- Running your main SSH server on a non-standard port, while not impenetrable, is a good basic security measure for reducing, somewhat, the ease with which SSH scanners target your server. More info here.
- Gitea HTTP Listen Port: leave this at the default, or some non-standard port. We're going to be using the reverse proxy on the standard ports 80 and 443 to internally proxy requests to this port.
- Gitea Base URL: because we're going to be using reverse proxy, the actual URL users will use to access the instance is different than the port the native server runs on. So, this should be the address users will navigate to to use the reverse proxy version. (e.g. "https://git.yourdomain.com/")
After changing the appropriate settings, click "Install Gitea." This will setup the initial config file, and redirect you back to the homepage.
Unless you specified it during the setup wizard, the first user to register on your instance will become the site administrator, so it's a good idea to go ahead and create that account at this point.
Step 3: SSH Server Tweaks
As mentioned above, we're going to tweak the port of the native SSH server and use Gitea's built-in SSH server on port 22. To do this, we will first change the native SSH port. Let's do that now.
Most Linux distros use an implementation of SSHD which stores its daemon configuration file at /etc/ssh/sshd_config. Let's edit that file to change the default listening port.
First, choose a new port for the SSH server to listen on. Ideally this would be something above the 1050s, as these are largely unreserved and are meant for misc applications.
After choosing a port, modify the SSHD config file to include the following line:
Port 4458
(Where 4458 is replaced with the port number you chose.) Make sure that, if there is an un-commented like specifying Port 22, you comment it out or remove it.
Technically, that's the only change required to change the SSH port. However, there's one big hole here that I have fallen in many times:
Make sure you open the new port in the firewall so you don't lose remote access to the system!
Most system firewalls open port 22 by default, but we need to open the new port we've chosen. Restarting the SSH server now, we would lose access to the system. You need to open the appropriate port in your system's firewall. It's probably best for you to look up what firewall type your system is running, but here are two common ones, UFW and iptables:
~# ufw allow 4458		# for UFW systems
~# iptables -I INPUT -p tcp -m tcp --dport 4458 -j ACCEPT		# for iptables systems
~# iptables-save > /etc/iptables/rules.v4
Now that we've opened the port, we can restart the SSH server, and it should start listening on the new port:
~# systemctl restart sshd
This will disconnect you from the SSH connection. To open a new connection, specify the -p flag with the new port number for most ssh clients:
~$ ssh -p 4458 root@git.yourdomain.com
Setting up Gitea's SSH server
Now that we've cleared port 22, we will configure Gitea to start its internal SSH server on that port. To do this, we need to edit the /etc/gitea/app.ini file that was created during the initial configuration.
Under the [server] config block, ensure that the following values are set:
[server]
START_SSH_SERVER = true
SSH_PORT = 22
This will tell Gitea to start its internal SSH server on port 22. However, if we were to restart the Gitea server right now, we would run into an error. That's because, since we have configured our Gitea server to run as the non-root user git, it doesn't have permission to bind to port 22. To solve that, we can specifically grant permission:
~# setcap CAP_NET_BIND_SERVICE=+eip /usr/local/bin/gitea
This will give the Gitea binary permission to bind to ports under 1000. Now, we can restart the Gitea server:
~# systemctl restart gitea
When you create repositories with your account, you should now see the option to clone the repo using SSH:
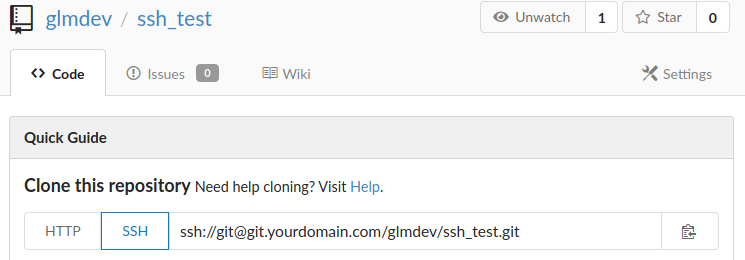
You will need to add your public key to your account in User > Profile > Keys before you can clone the repositories.
Step 4: Reverse Proxy (reprise)
Now that we have our Gitea server up and running, we need to set up the reverse proxy to allow users to connect to our server from the outside world. This is done by creating a virtual host on your web-server of choice (again, I'm using Apache2 for this guide) that listens for requests from a particular domain name and forwards them to the internal server for Gitea.
This is pretty straightforward. First, make sure that the domain you specified in the Gitea initial configuration wizard points to the server running the reverse proxy (e.g. an A record for git.yourdomain.com).
Next, create the virtual host file in your web-server's configuration. Here's an example of the one I use for Apache2. Add this site to /etc/apache2/sites-available/git.conf:
<VirtualHost *:80>
        ServerName git.yourdomain.com
        Redirect / https://git.yourdomain.com/
</VirtualHost>
<VirtualHost *:443>
        ServerName git.yourdomain.com
        SSLEngine on
        SSLCertificateFile /path/to/your/cert.crt
        SSLCertificateKeyFile /path/to/your/cert.key
        SSLCertificateChainFile /path/to/your/ca.crt

        SetEnv proxy-sendcl
        LimitRequestBody 102400000
        ProxyPreserveHost On
        ProxyPass / http://127.0.0.1:3000/
        ProxyPassReverse / http://127.0.0.1:3000/
</VirtualHost>
Essentially, this virtual host defines a listener for the git.yourdomain.com address on port 80 and redirects it to use TLS on the default port. This is considered best practice. You should not allow insecure connections to your Gitea instance, particularly because it will transmit sensitive user data like passwords, SSH keys, and other info.
Then, we define a virtual host listener for the same domain on port 443 and configure it to use the TLS certificates. The generation and maintenance of these certificates is well beyond the scope of this walk-through, but suffice it to say that, if you're a beginner to TLS, you can generate free certificates that renew automatically using the Let's Encrypt CertBot plugin for Apache2. This is a great solution here.
The latter half of the 443 virtual host does two things:
- Raise the size limit on the request body to around 100MB. This helps prevent errors for larger repositories or repositories with large files. It's a good idea not to set this too high, as it exposes your server to additional vulnerabilities.
- Reverse proxy all requests to this virtual host along to the internal server running on port
3000, while preserving the original host in the process.- This is the magic that makes the reverse proxy work. Notice that, while the virtual host is requiring users to connect via a secure format, the internal reverse proxy is using unencrypted HTTP. This is one of the most powerful things about reverse proxies: they have the ability to generally secure unencrypted web-apps.
- Even though Gitea supports running a TLS server, using an Apache2 reverse proxy enables us to (1) run the Drone CI from the same machine on a different virtual host, and (2) use a generic and well-supported means of managing sites and certificates, rather than modifying it for each individual application we run.
After creating the virtual host, we will enable it and reload Apache2:
~# a2ensite git
~# systemctl reload apache2
Now, you should be able to navigate to https://git.yourdomain.com and see the Gitea server.
At this point, it's a good idea to entirely remove access to the unsecured port 3000 externally. This usually means ensuring that your firewall is properly configured to only whitelist the appropriate ports for the two SSH servers, and the HTTP/S servers (as well as anything else you have running).
Part I Conclusion
That's where we'll stop for part I. At this point, you should have a fully--functional, self-hosted Git server that spars feature-for-feature with GitHub, but with complete privacy and control of your data.
In part II (coming soon), we'll look at setting up the Docker-based Drone CI and integrating it with Gitea for a seamless, efficient, joyful development/DevOps experience.
Thanks! Garrett
P.S. - As always, if you have questions, feel free to reach out. You can get in touch with me using the information here.