Two years ago, I switched laptops from a mid-range Asus laptop to the then-current Dell XPS 15 9500. A faster CPU/GPU and more RAM were the primary upgrades, but I also liked the keyboard on the XPS quite a lot.
Since then, I have used this machine as my daily driver for everything. As a student and occasional from-home worker, this laptop has seen a lot of use. It has held up admirably, but one issue has developed in the last 3 or 4 months that has been the bane of my existence.
I've noticed that the keyboard has a tendency to accumulate dust and small debris over time, and this problem manifested itself in the most annoying possible way: some heavily-used keys started to require multiple presses or lots of force to register the keystroke. Namely, the worst offenders are the W, E, A, and left shift and control keys. This would result in annoying sentences like:
th quick bron fox jumps ovr th lzy littl puppy dog.
As a touch-typist, having to stop, backspace, and re-type sentences constantly while hitting the shift key with the force of god himself was getting really, really old. I had tried blowing around the edges of the keys with canned air, but this produced little result.
I'm not sure if this problem is unique to me, but I wasn't able to find many other people online with the same experience. The few cases I did find of people asking about cleaning the keyboard on this laptop contained unhelpful suggestions like removing the keyboard assembly entirely to clean it. This, while it would probably solve the problem and is well-documented in the service manual, requires basically a complete tear-down of the laptop.
However, after a bit of trial-and-error and reading the manual, I have found that the best way to clean the keys is to remove the key caps and blow the key wells out with compressed air. This requires a bit of finesse to do without breaking the key switches, so I decided to write-up perhaps the most niche how-to of all time.
So, with that said, here's the definitive guide on removing the key-caps from your Dell XPS 15 9500 series to clean under them.
Step 1: Removing the Normal Key Caps
I'm going to go into a fair bit of detail here, since understanding the structure of the key caps is key to removing them without irreparably breaking them.
The normal keys on the laptop are membrane keys with plastic scissor switches. These switches are connected to the key caps with two grasp clips near the top of the key and two slots near the bottom of the key. Here's what I mean:
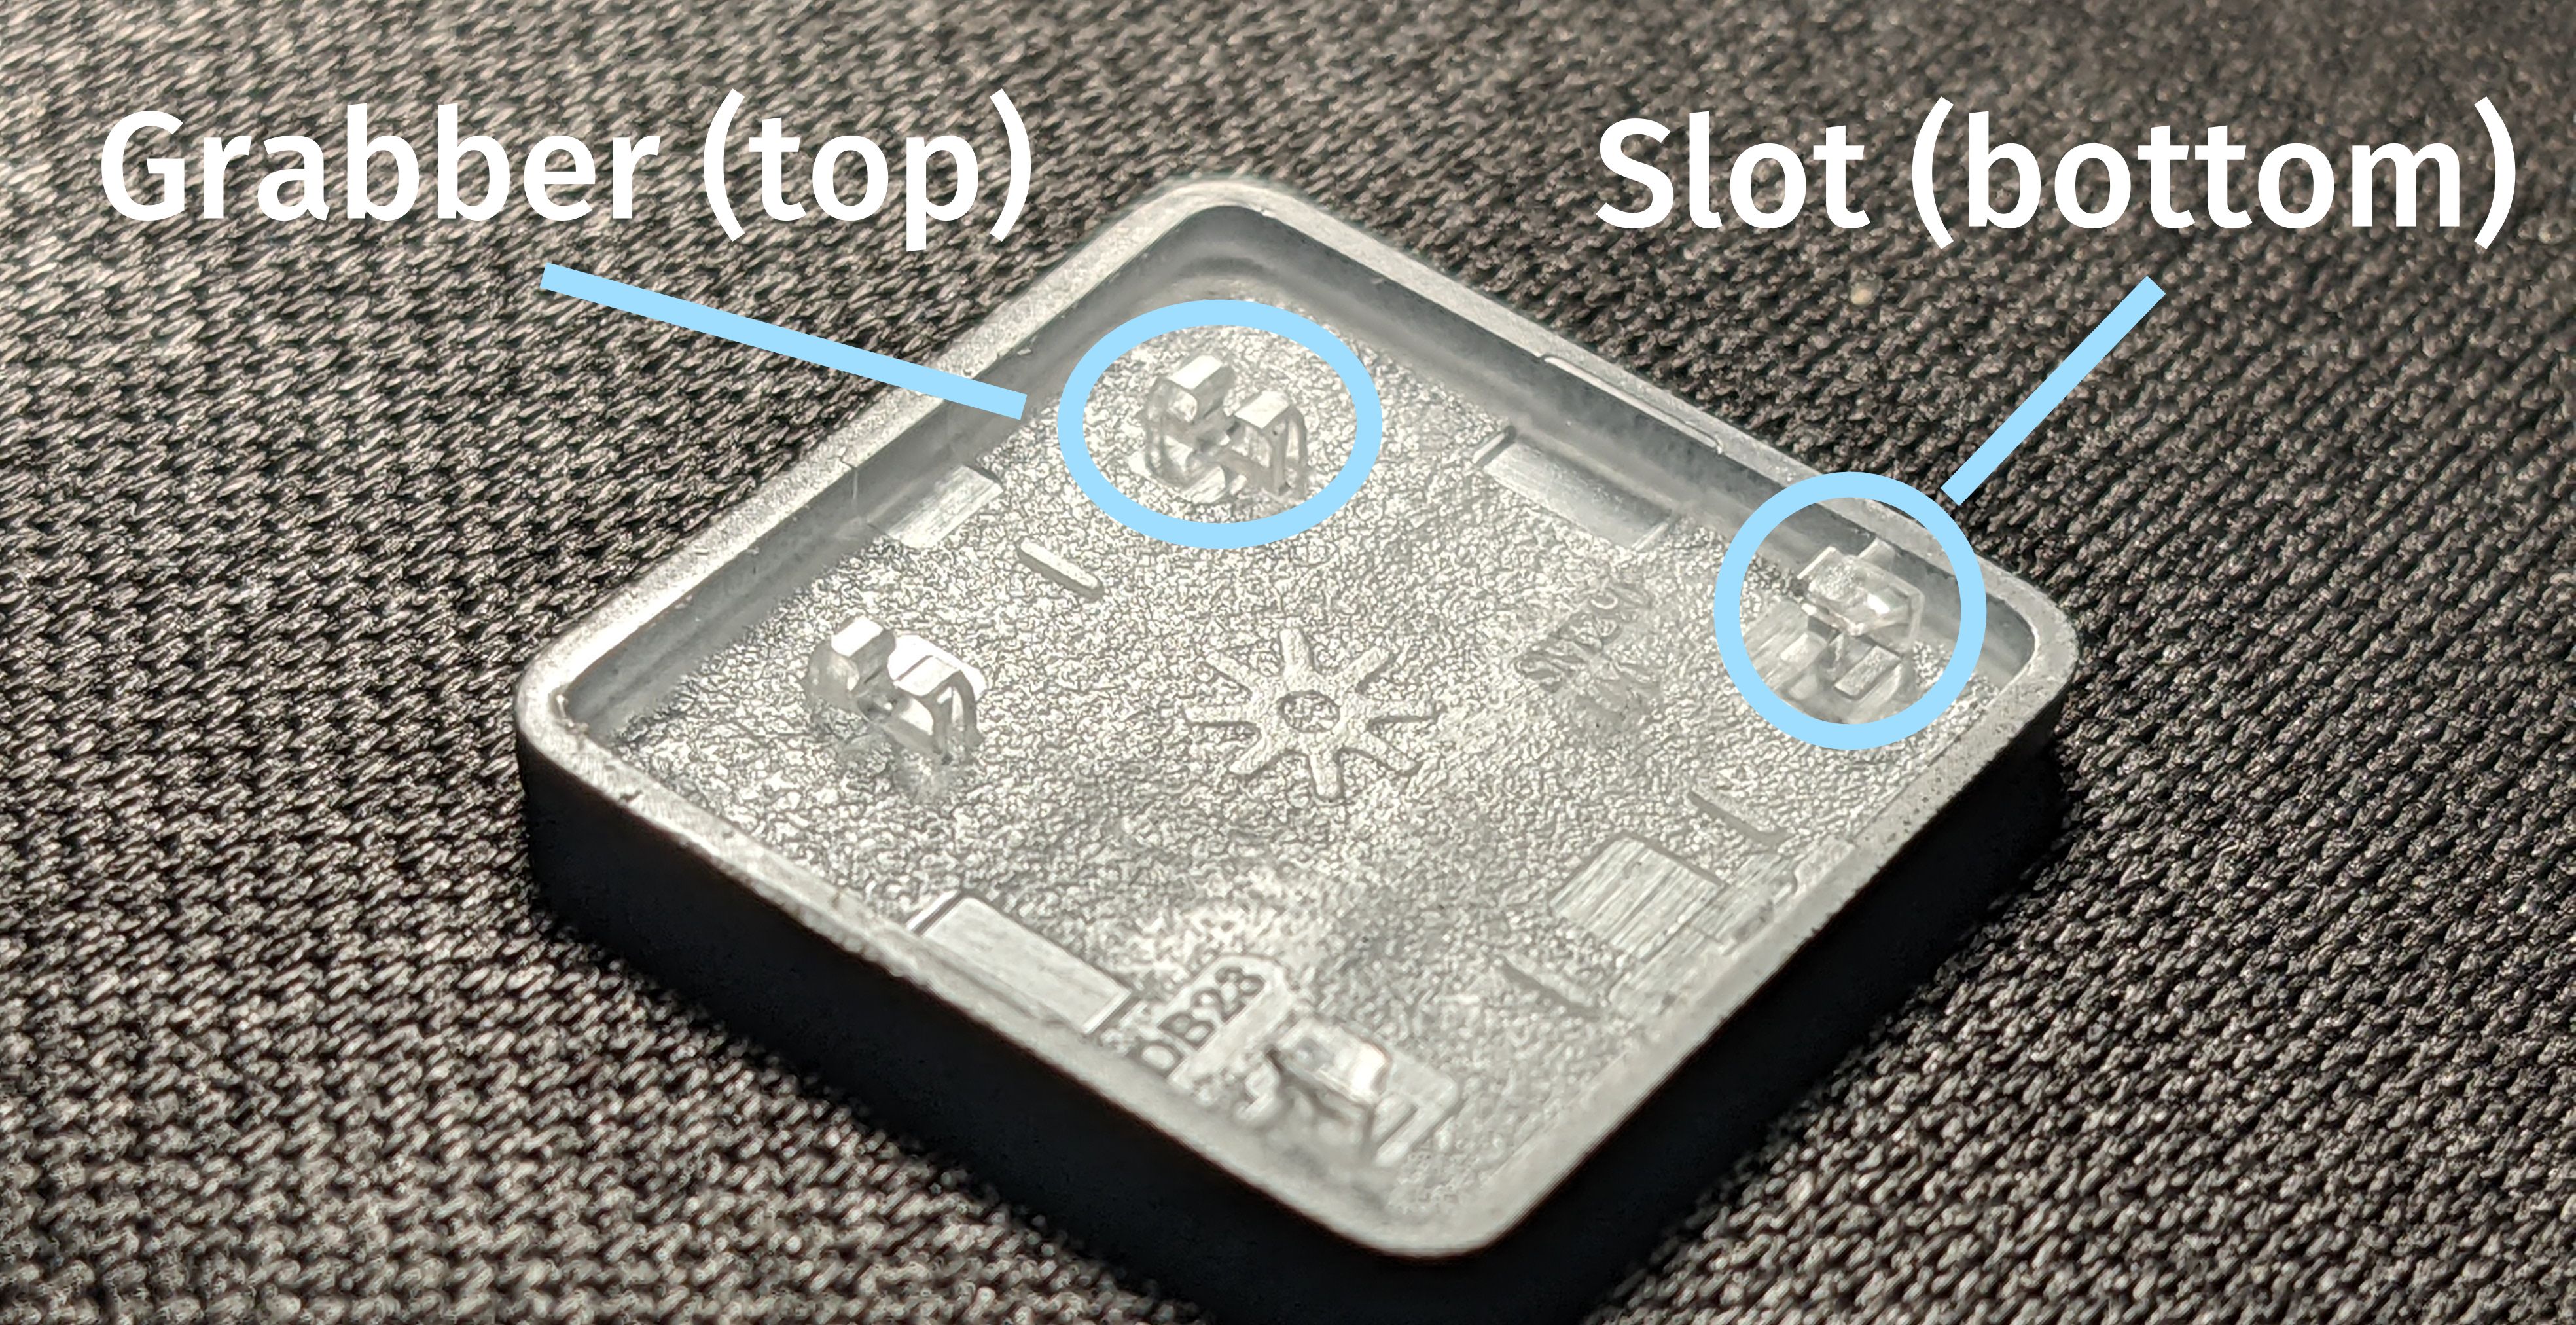
Here's the corresponding switch for this key cap. You can see the small bars to which the grabber attaches, and the small plastic flaps the slots slide under. When removing the keys, the biggest challenge is doing so without breaking the small plastic piece the slot slides under. Doing this can make it so that the key doesn't re-attach properly, which will necessitate replacing the entire scissor.

The safest/most reliable way I've found to remove the keys without breaking the plastic flaps on the switches is to use a small flathead screwdriver (the kind meant for electronics, really small). Use the screwdriver to lift one of the side edges of the key. Then, while holding it up, slide the screwdriver under the key cap. The goal here is to position the tip of the flathead between the key cap and the switch as close to the point where the grabber attaches to the plastic bar.
Then, use your finger to gently apply pressure to the bottom of the key. This will help prevent you from accidentally prying up the bottom of the key. Press down with the screwdriver to pop the plastic bar out of the grabber. You will have to do this once for each grabber on either side of the key cap. Be careful to position the screwdriver right next to the plastic beam each time. After un-clipping the two grabbers, the key cap should lift off with minimal resistance. The most important tip for this step is to NEVER force anything too much. Doing so means you'll likely break some delicate piece of plastic.
Step 2: Removing the Special Key Caps
The modifier keys, by virtue of the keyboard layout, have special key switches and stabilizers under them since the key caps are larger. Removing these is pretty similar to the normal key caps, but with a couple extra considerations. The shift keys are a good example of this. For example:
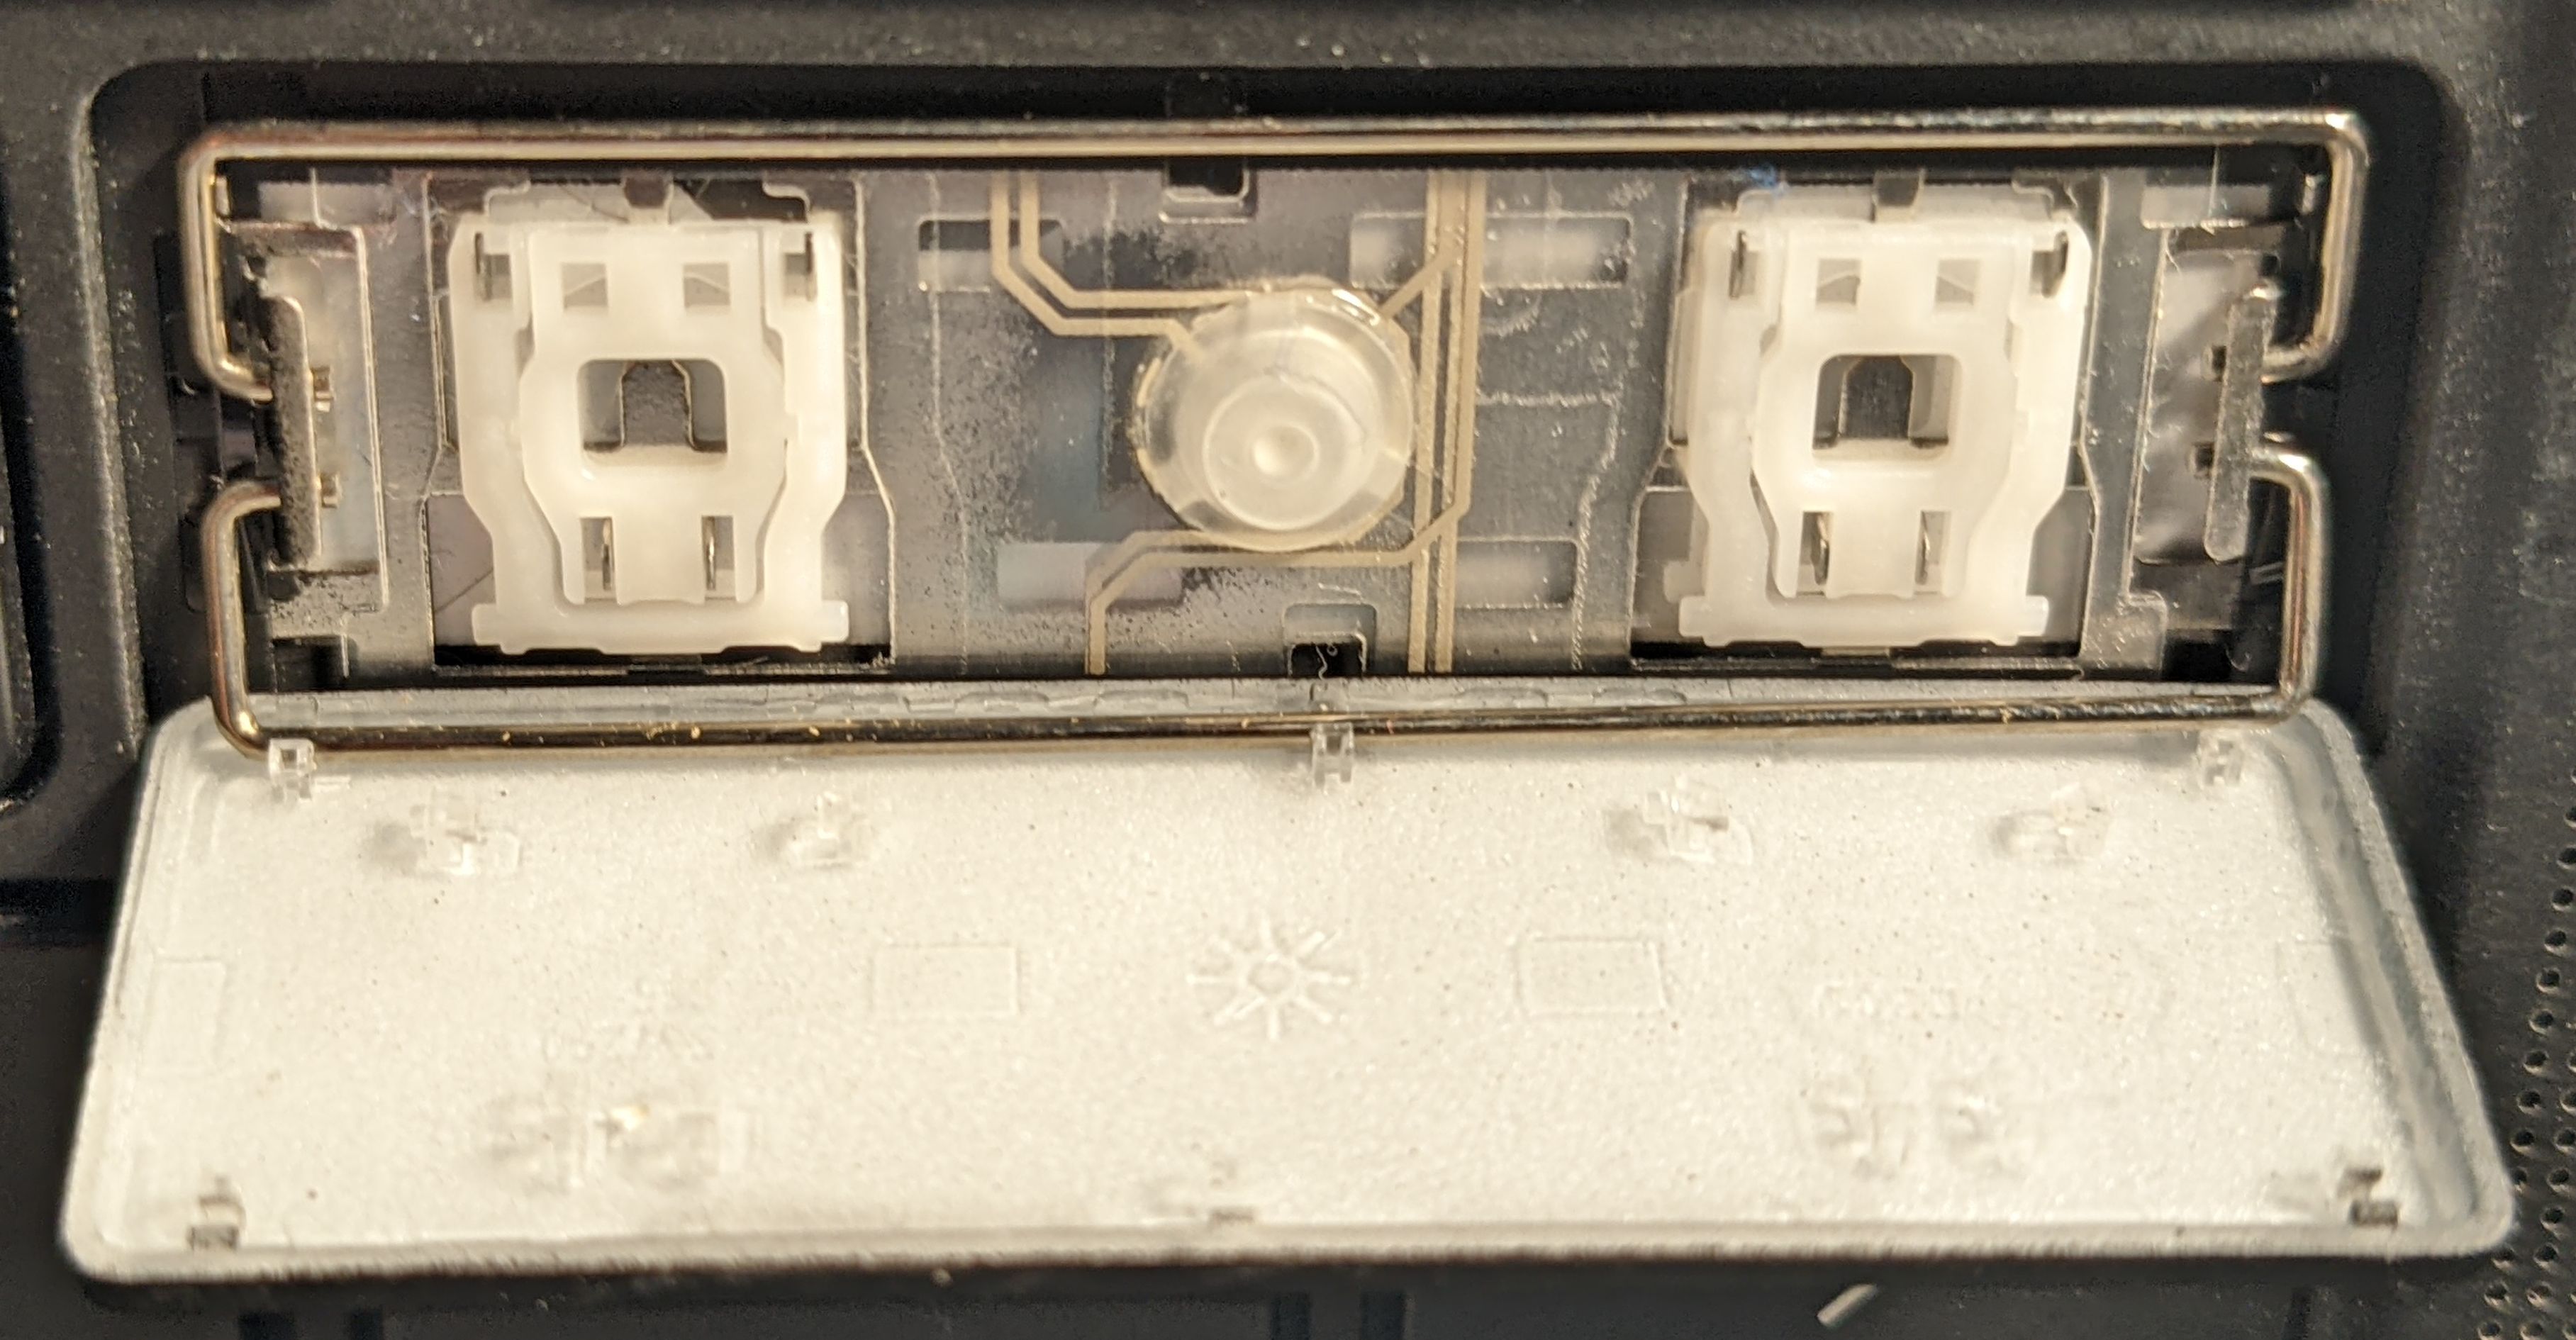
The easiest way I've found to clean under these keys is to use the screwdriver to detach the key cap from the top stabilizer bar (this is held on with the same kind of grabbers) then use the tip of the screwdriver to detach the grabbers from the switches, similarly to the normal keys. You don't need to fully remove the bottom stabilizer. If it seems like the key is still stuck on the bottom after un-clipping the top stabilizer and tops of the key switches, try laying the key back down (but don't re-clip it) and sliding it toward the track-pad a bit to un-slot the bottom plastic tabs. It should then turn down like the picture.
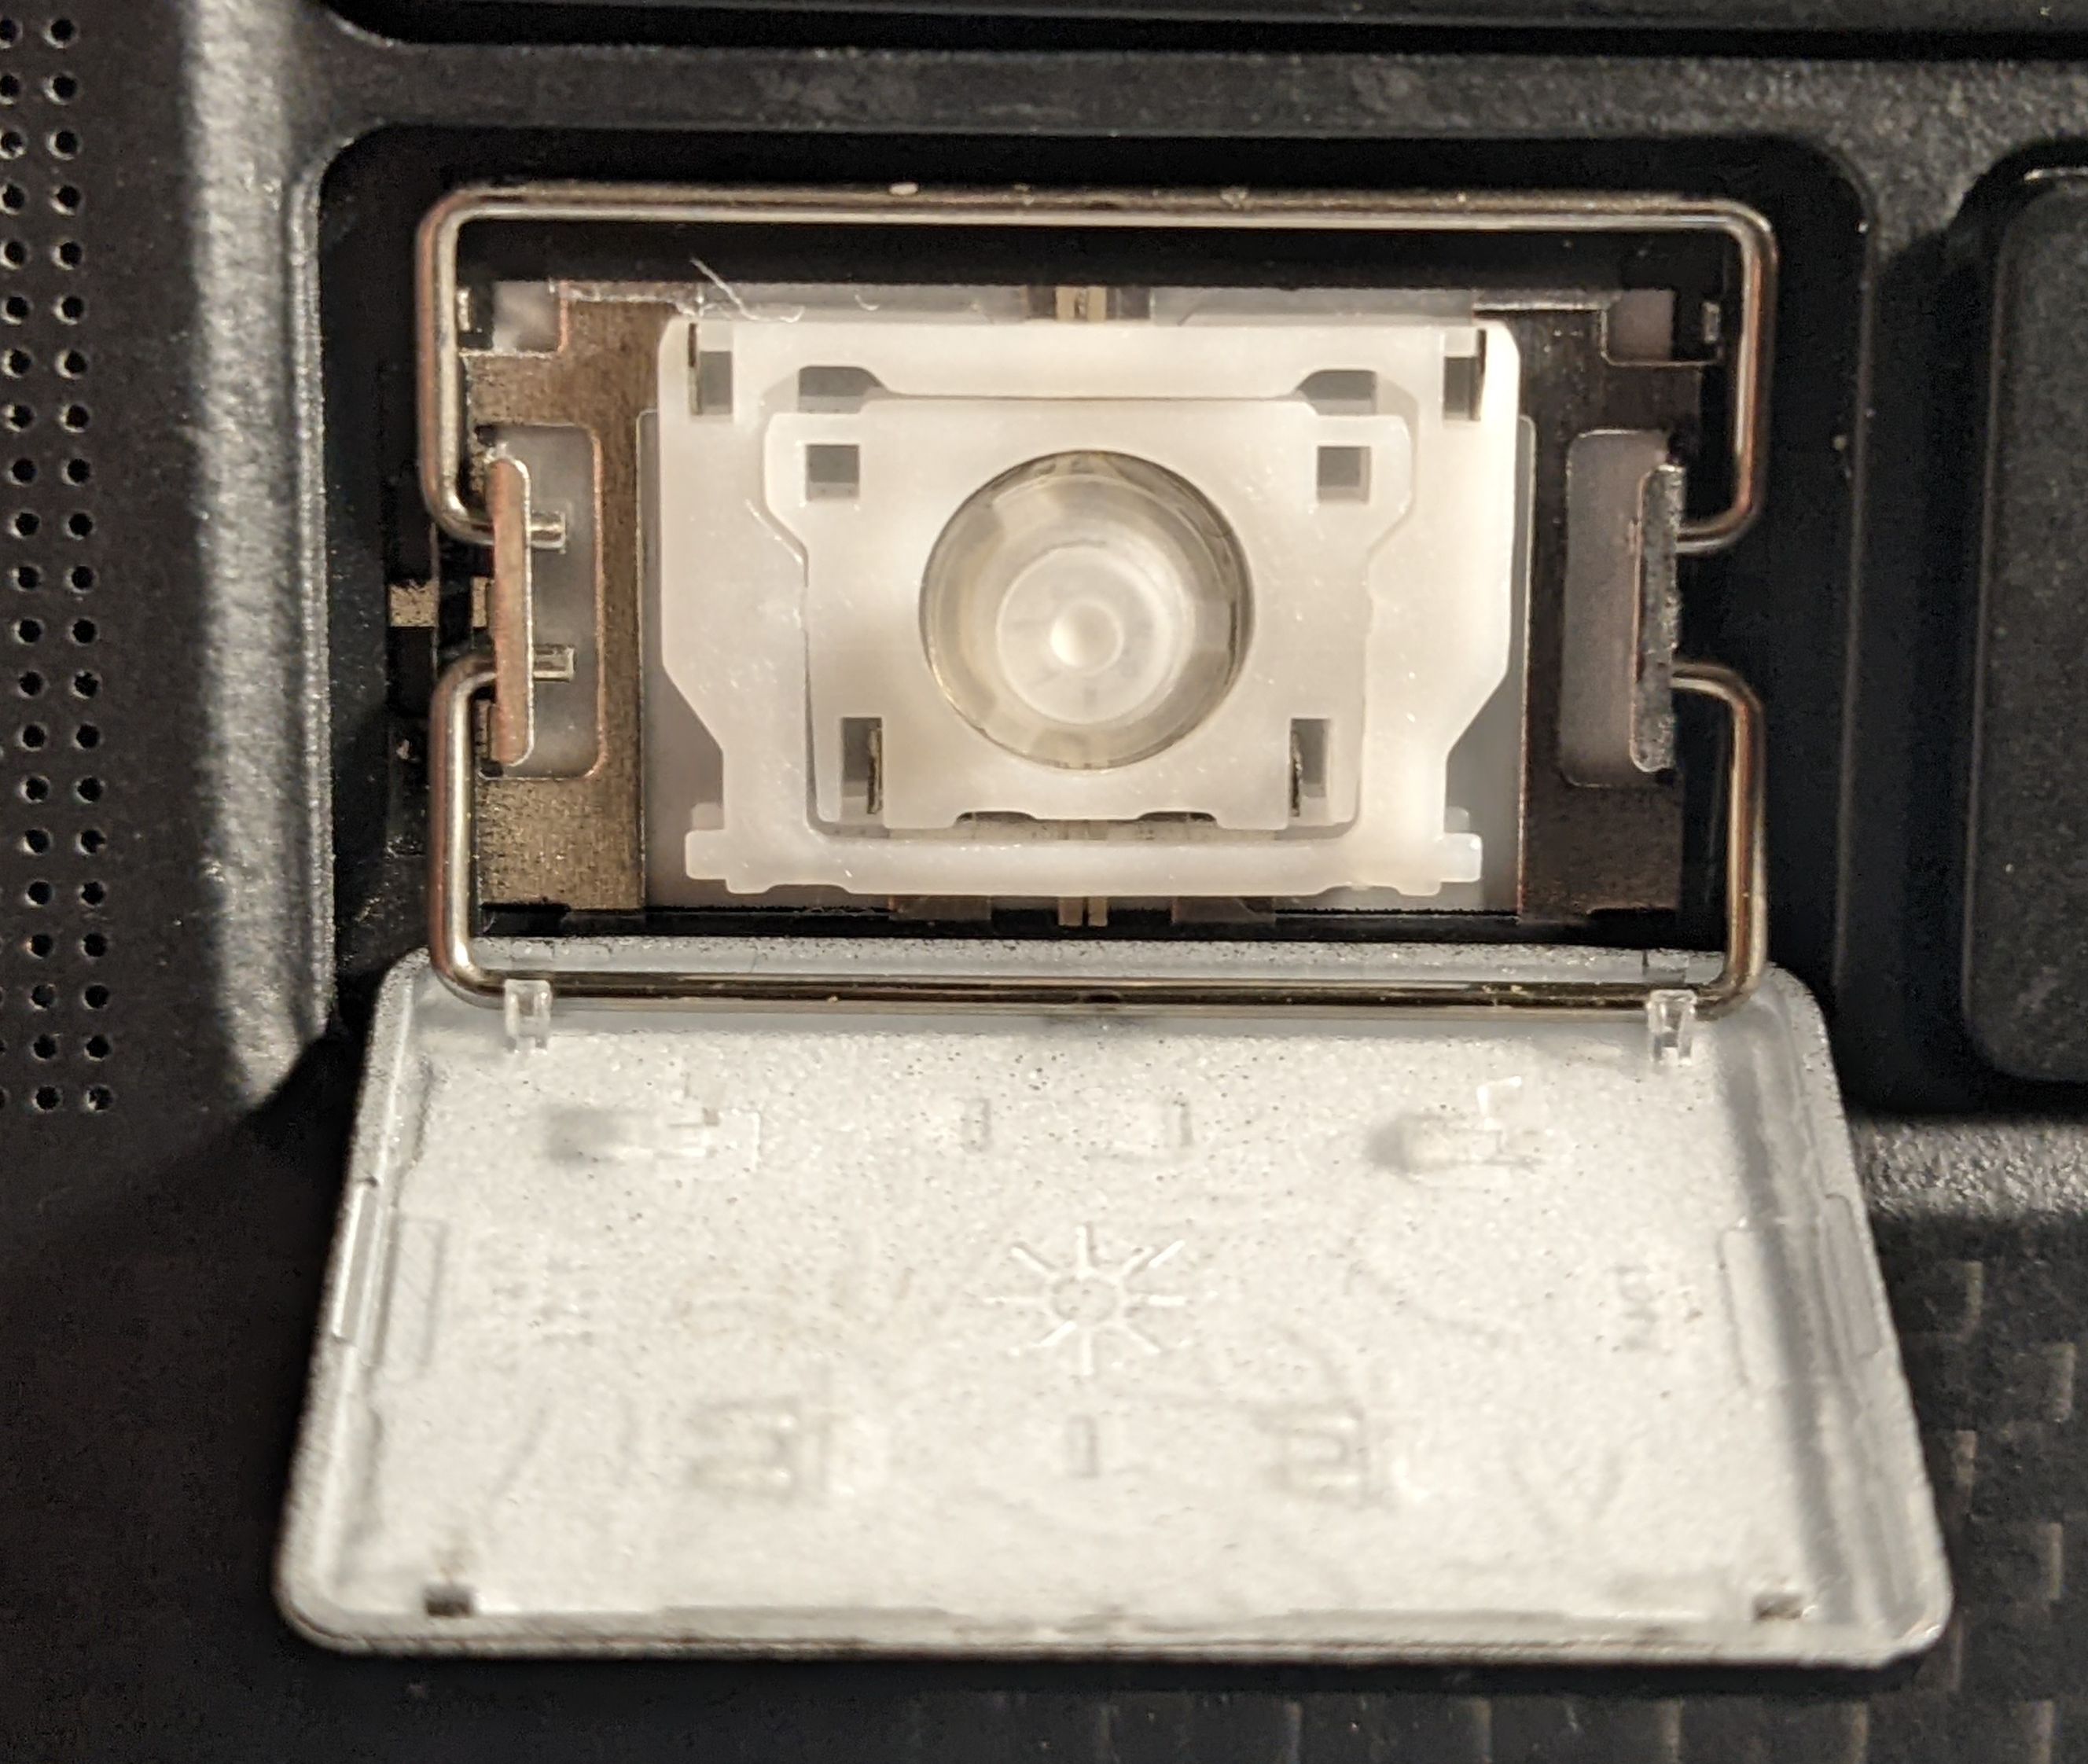
To re-attach the key cap, lay it back down on top of the stabilizer and press down over the three grabbers for the stabilizer. Then, press firmly over the top of each of the key switches to make sure their grabbers are re-attached. The left control key is similar:
Step 3: Cleaning
Once you've got the affected keys removed, you can clean the key wells using one of those cans of compressed air meant for electronics. Since these cans need to be used upright in order to not blast liquid on the device, I found it was useful to turn the laptop on its side to clean the keys.
When blowing them out, make sure to get around the edges of the key well and, specifically, in the area between the bottom of the key well and the plastic key switch.
Step 4: Re-assembly
This is pretty straightforward. For the stabilized keys, lay the key so the grabbers are lined up with the stabilizer and press firmly over each of them until they re-click onto the stabilizer. Then, press down firmly over the area above each of the switches until all the grabbers are re-attached.
For the normal keys, simply place the key back on top of its switch, taking care to line up the grabbers, and press firmly on the key until all the connection points click into place.
Results
For the most part, this was a very worthwhile venture. Since doing this, I haven't noticed any issues with the normal keys like W, E, and A, and the left control key has been working perfectly as well. Unfortunately, the left shift key still requires more force than usual to register a key stroke, though noticeably less than before. I'm not sure, but if I had to guess I would say this is because of the actual membrane button wearing out because it is centered on the key, but I almost always hit the key from the right edge while typing. It's subjective, but it feels like less force is required to register a key stroke when I depress the key from the left edge.
All in all, for the cost of a can of compressed air, this has very nearly solved the key issues I was having that were making the laptop very frustrating to use. I suspect this guide will mostly be used as a future reference for myself, but if there are any other Dell XPS users out there who have noticed this problem, perhaps this can help you out.